Schedule dashboard email updates
Schedule and share timed email updates of your dashboard to stakeholders.
- Click the App Drawer and select Dashboards, and then select a dashboard from the list..
-
In an existing dashboard, click the
Options button on the top right of the page
and then, click
Schedule delivery.

-
In the
Settings tab, configure the following options.
Options Description Recurrence Select a schedule interval the dashboard should be emailed at. The following options are available: - Monthly
- Weekly
- Daily
- Hourly
- Minutes
- Specific months
- Specific days
Note: The Datagroup update option does not work.Note:- Send now will send the dashboard email out immediately.
- The timing options change depending on the options selected in Recurrence.
- The end time for Hourly and Minutes intervals is not inclusive. The last delivery will be sent at the last selected interval prior to the specified end time. For example, if content is scheduled Hourly between 12:00 AM and 11:00 PM, it will be sent on the hour, every hour, from 12:00 AM to 10:00 PM. If content is scheduled Minutes every 30 minutes between 12:00 AM and 11:00 PM, the last delivery will be sent at 10:30 PM.
- The time zone of the schedule can be adjusted in the Advanced options section.
Destination Email is the only Destination selection available. Email addresses Type in the email addresses of the recipients. Use a comma or press Enter after each email address if there are multiple email addresses. Format Select an output format for the dashboard. The following options are available: - PDF: Exports as a PDF attachment.
- Visualization: Exports as a single image.
- CSV ZIP file: Unformatted data from the dashboard is delivered as a zipped CSV file.
-
In the
Filters tab, you can adjust the filters
already in place or add new filters.
For more information, see Add a dashboard filter.Note: Filters adjusted in this dialog will not affect the filters in the Dashboard or Tile.
-
In the
Advanced options tab, customize the export
options.
Depending on the output format selected, options will differ.
Advanced Options Options Custom Message Insert a message to be included as the body of the email. Note: This is only available for emails.Include links Includes links. Note: This is only available for emails.Expand tables to show all rows Displays all the rows in a table rather than what is shown in the tile thumbnail. Note:- The Data table of a tile is used when exporting.
- This is only available for PDF formats.
Arrange dashboard tiles in a single column Displays the dashboard tiles in a single vertical column. Note: This is only available for PDF and PNG formats.Paper Size Specify the size and orientation of the dashboard. Note: Large visualizations or groups will need to be resized to fit on a PDF page.Timezone Select the time zone of when the delivery occurs. - Click Test now to see if the delivery is successful.
- Click Save.
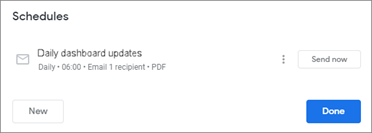
- Optional: In the Schedules dialog, click Send now beside the schedule created to send immediately.
The following options are available if you want to create, edit, duplicate, or delete a schedule:

- To create a new schedule: In the bottom left of the dialog, click New.
- To edit a schedule: To the right of an existing schedule, click Options > Edit.
- To duplicate a schedule: To the right of an existing schedule, click Options > Duplicate.
- To delete a schedule: To the right of an existing schedule, click Options > Delete.